
Feb 27, 2013
Feb 12, 2013
Oracle Identity Manager(OIM) API for Account Provisioning
Oracle Identity Manager allows you to provision account using the OIM api. You can use Oracle Identity Manager to create, maintain, and delete accounts on target systems. Oracle Identity Manager becomes the front-end entry point for managing all the accounts on these systems. After the accounts are provisioned, the users for whom accounts have been provisioned are able to access the target systems without any interaction with Oracle Identity Manager. This is the provisioning configuration of Oracle Identity Manager.

Sometimes you will need give account from remote operations (webservice or some remote connector).For this operations , you have to find right application instance for provision account. You can use findApplicationInstanceByName method of oracle.iam.provisioning.api.ApplicationInstanceService service for find application instance. Then,you can provision an application instance with OIM api, usingoracle.iam.provisioning.api.ProvisioningService service.
import oracle.iam.provisioning.api.ProvisioningService;
import oracle.iam.provisioning.api.ApplicationInstanceService;
public void provisionAccount(String userKey) throws ApplicationInstanceNotFoundException,
GenericAppInstanceServiceException,
UserNotFoundException,
GenericProvisioningException {
ProvisioningService service=getClient().getService(ProvisioningService.class);
ApplicationInstance appInstance=findApplicationInstanceByName("Application Instance Name");
//serverName example : UD_ADUSER_SERVER
//itResourceName example : Active Directory
FormInfo formInfo = appInstance.getAccountForm();
Map parentData = new HashMap();
parentData.put(serverName, itResourceName);
String formKey = String.valueOf(formInfo.getFormKey());
AccountData accountData = new AccountData(formKey, null, parentData);
Account account = new Account(appInstance, accountData);
account.setAccountType(Account.ACCOUNT_TYPE.Primary);
service.provision(userKey, account);
}
public ApplicationInstance findApplicationInstanceByName(String applicationInstanceName) throws ApplicationInstanceNotFoundException,
GenericAppInstanceServiceException {
ApplicationInstanceService service=getClient().getService(ApplicationInstanceService.class);
ApplicationInstance appInstance=service.findApplicationInstanceByName(applicationInstanceName);
return appInstance;
}
Feb 1, 2013
WebLogic Server 12c: Configuring and Using Node Manager
In a production environment, WebLogic Server instances are often distributed across multiple domains, machines, and geographic locations. Node Manager is a WebLogic Server utility that enables you to start, shut down, and restart the administration server and managed servers from a remote location. Although Node Manager is not required, it is recommended if your WebLogic Server environment hosts applications with high availability requirements.
A Node Manager process is not associated with a specific WebLogic domain, but with a particular machine. You can use the same Node Manager process to control server instances from any WebLogic Server domain, as long as those server instances reside on the same machine as the Node Manager process.
It covers configuring and starting the Java-based Node Manager and using it to control Oracle WebLogic Server 12c (12.1.1) managed servers.
Inspecting the Current Machine Configuration
To check the configuration of the machines created in the earlier tutorial, perform the following steps:
| 1. | If the administration server of the domain is not already running, it must be started. To start it, in a Terminal window, navigate to the domain directory, and enter the command: $ ./startWebLogic.sh  When prompted for a username and password, enter the credentials of the domain administrator. |
|---|---|
| 2. | After the administration server is up and running, access the WebLogic Server administration console. Open a web browser and enter the URL: http://hostname:port/console In this tutorial, that is: http://host01.example.com:8001/console Note: Use the host name of your host. Also, if you used a different port number for the administration server, use that port instead. On the Welcome screen, log in using the username and password entered to start the administration server. 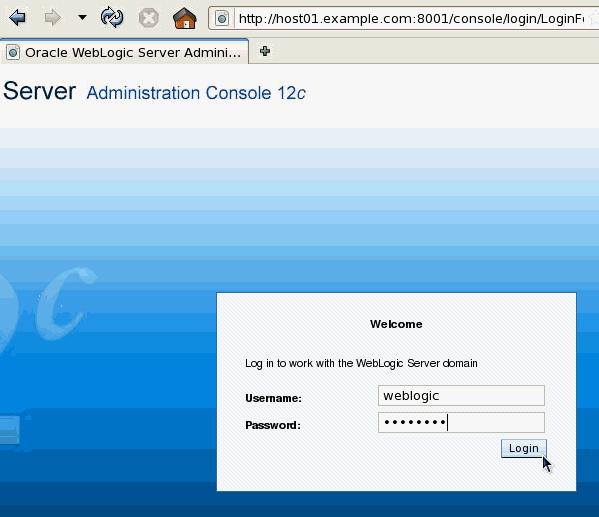 |
| 3. | If any of the managed servers (dizzy1, dizzy2, dizzy3) are running, shut them down. |
| 4. | Check the configuration of the machines created in the tutorial titled Oracle WebLogic Server 12c: Creating and Configuring Machines. Under Domain Structure, expand Environment (by clicking the + next to it). Then click Machines.  |
| 5. | In the Machines table, click dizzyMachine1.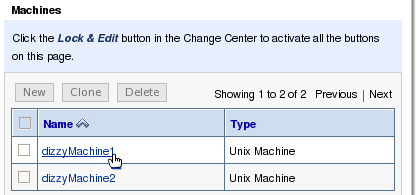 |
| 6. | Under Settings for dizzyMachine1, click the Configuration tab and the Node Manager subtab.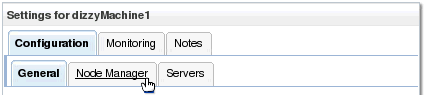 |
| 7. | Here you can see the settings for the Node Manager for this machine. It has the Type set to Plain (which means the Java-based Node Manager that does not use SSL), the Listen Address set to host01.example.com , and theListen Port set to 5556.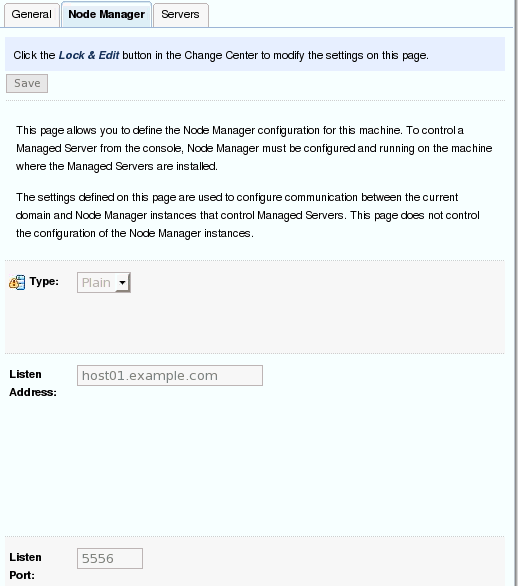 |
| 8. | Also check the Node Manager settings for dizzyMachine2. Back under the Domain Structure, underEnvironment, click Machines. In the Machines table, click dizzyMachine2. Under Settings for dizzyMachine2, click the Configuration tab and the Node Manager subtab. Here you can see the settings for the Node Manager for dizzyMachine2. It has the same settings as the Node Manager for dizzyMachine1, except the Listen Address is set to host02.example.com and the Listen Port is set to 5557. 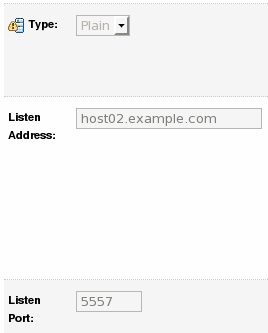 |
Configuring Node Manager
To create a new Node Manager home directory on a machine and then configure its settings, perform the following steps:
| 1. | Open a new Terminal on host01, and navigate to the installation directory, |
|---|---|
| 2. | Create a new directory  |
| 3. | Copy the following file to the dizzyMachine1 directory: |
| 4. | Edit the file |
| 5. | Set the NODEMGR_HOME variable to the current path. In this tutorial, it is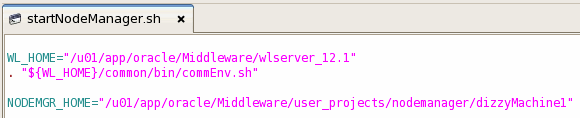 |
| 6. | Create a new file |
| 7. | Add the following three lines to the new file:
Then save your changes.  |
| 8. | Access the second machine, host02. You will set up node manager here as well, this time for dizzyMachine2: Create a new directory Edit the copied script to set the NODEMGR_HOME variable to the current path. In this tutorial, it is Create a nodemanager.properties file once again, but this time enter the listen address and port number fordizzyMachine2:
Save this file. 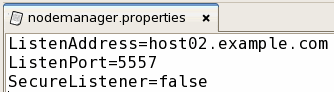 |
Enrolling Computers with a Domain
To enroll a computer with a domain, so that the Node Manager on that computer will accept requests from the domain, perform the following steps:
| 1. | Access host01. In a Terminal window navigate to Run the setWLSEnv.sh script to set up the environment needed for WLST as follows: $ source setWLSEnv.sh  |
|---|---|
| 2. | Open WLST in interactive mode by entering the following command in the Terminal window: java weblogic.WLST  |
| 3. | At the WLST prompt, enter the following command to connect to the running administration server: wls:/offline> connect(' Replace the sample argument values with those that match your domain environment. In this tutorial, the command is: wls:/offline> connect('weblogic', 'Welcome1', 't3://host01.example.com:8001')  |
| 4. | Run the nmEnroll() command. This command enrolls the computer on which WLST is running with the domain of the administration server to which WLST is connected. What "enrolling" means is the command downloads two files from the administration server to this computer: nm_password.properties andSerializedSystemIni.dat. The Node Manager "secret file," nm_password.properties, contains the encrypted username and password used by the adminstration server to authenticate itself to the Node Manager process. This file is placed in the domain directory under /config/nodemanager/. The file used for encryption and decryption, SerializedSystemIni.dat, is placed in the domain directory under/security/. In addition, the nmEnroll() command creates or updates the nodemanager.domains file found in the Node Manager home directory. It adds the current domain to the list of domains that this Node Manager is allowed to manage. The nmEnroll() command has two arguments:
In this tutorial, the command is: nmEnroll('/u01/app/oracle/Middleware/user_projects/domains/dizzyworld', '/u01/app/oracle/Middleware/user_projects/nodemanager/dizzyMachine1') Note: Be sure to put the right path to your domain and to your Node Manager when using the command. 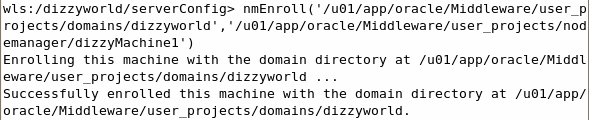 |
| 5. | Exit WLST by entering the following command at the prompt: exit() 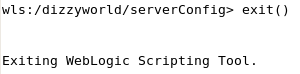 |
| 6. | Access host02 and repeat these steps to run nmEnroll() for the dizzyMachine2 Node Manager home directory: nmEnroll('/u01/app/oracle/Middleware/user_projects/domains/dizzyworld', '/u01/app/oracle/Middleware/user_projects/nodemanager/dizzyMachine2') |
Starting Node Manager
To start Node Manager, perform the following steps:
| 1. | On host01, navigate to ./startNodeManager.sh  Notice that Node Manager starts for dizzyMachine1.  |
|---|---|
| 2. | On host02, navigate to ./startNodeManager.sh |
Starting Servers with Node Manager and the Administration Console
To start the managed servers from the console, perform the following steps:
| 1. | Access the WebLogic Server administration console again. In the Domain Structure section, expand Environmentand click Servers.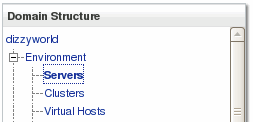 |
|---|---|
| 2. | Click the Control tab.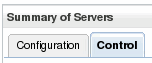 |
| 3. | Select the check boxes for all of the managed servers (dizzy1, dizzy2, and dizzy3). Then click the Start button.  |
| 4. | When prompted for confirmation to start the three servers, click Yes  |
| 5. | Click the refresh icon to periodically refresh the Servers table.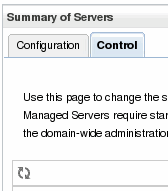 |
| 6. | After a few minutes, verify that each server's State is "Running."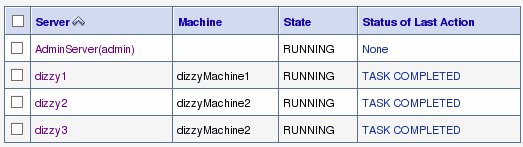 |
Subscribe to:
Posts (Atom)